
A field guide to GRAVHOUNDS enemies: swarmers, Goopers, armored units and the Juggernaut, with the tell and the turret that answers each.
GRAVHOUNDS Enemies Guide: Tells, Counters and Priorities
GRAVHOUNDS throws a lot of bodies at you, but it does not throw many kinds. The swarm is built from a small set of archetypes, and once you can identify which one is walking toward your kill box, the correct response is almost automatic.
This guide covers the archetypes you will meet in the launch build, the tell that identifies each, and the turret or weapon that answers it. It focuses on what is observable and confirmed; where an enemy's exact stats are undocumented, the guide says so rather than inventing numbers.
Official source: GRAVHOUNDS on Steam ↗ — enemy variety expands across 25 planets and 7 solar systems.
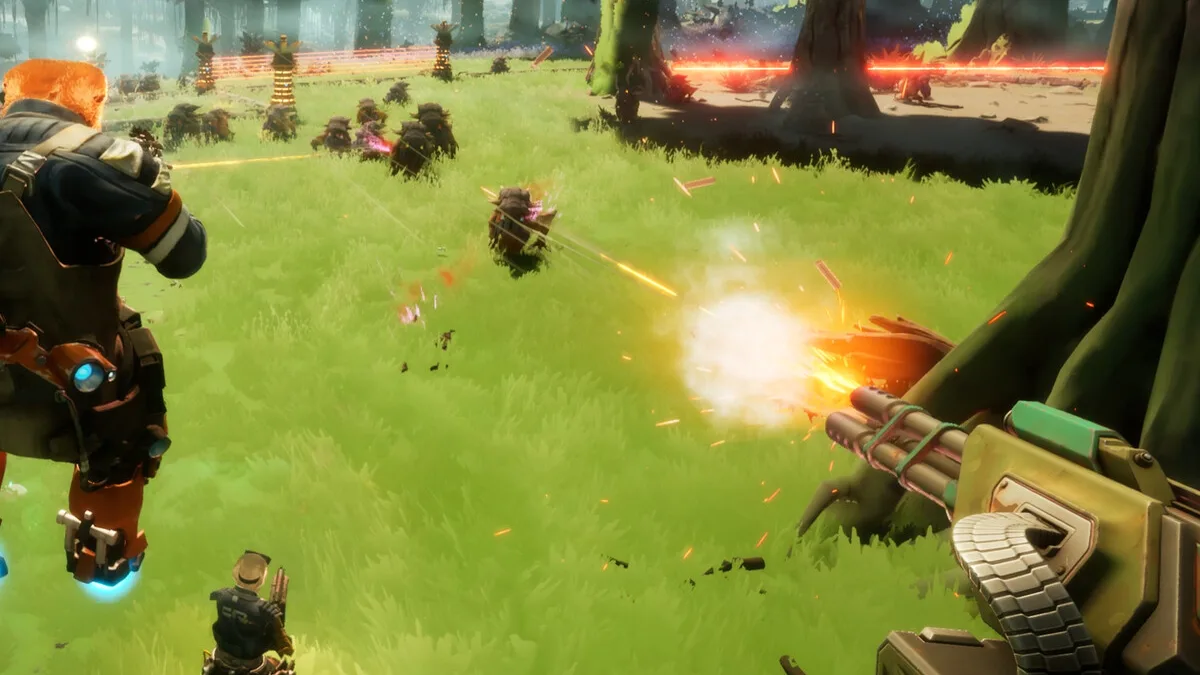
The four archetypes
1. Swarmers
Small, fast, numerous. They arrive in clumps, die to area damage, and exist to overwhelm your turrets' fire rate.
Tell: a low, spreading mass at the edge of the screen, often preceded by a chittering audio cue.
Threat: they reach the base and chew on structures. Individually weak, collectively lethal.
Counter: area turrets at the funnel mouth, Dozer's mines, and any on-kill mod. A direct-fire turret alone will kill them one at a time and lose the race.
Priority: medium. Kill them before they reach the collector, but do not chase them across the map.
2. Goopers
Ranged acid attackers. They lob projectiles from outside your kill box, which makes them the enemy that most often kills a base without touching it.
Tell: a stationary or slow-moving enemy that stops at range and rears back before firing.
Threat: they outrange your turrets and force you to leave cover to deal with them.
Counter: a long-range turret on high ground, the Grav Beam to pull them into the kill box, or a player push. Since the launch patch, Gooper acid no longer causes damage over time, so a hit is a hit rather than a death sentence.
Priority: high. A Gooper left alone will delete your generator while you fight the swarm.
3. Armored / tanky units
Slow, high-health enemies that walk through fire and reach the base. The launch patch reduced their durability, which makes single-target builds much better against them than they were in the demo.
Tell: a large silhouette that does not flinch, often with a heavier footstep sound.
Threat: they absorb turret fire that should be killing swarmers, and they break structures on contact.
Counter: precision weapon, crit burst, mines placed on their path. Do not waste area turrets on a single armored target.
Priority: high when they are in front, low when they are behind a swarmer wave. Kill the escorts first so the armored unit arrives alone.
4. The Juggernaut
The boss-level swarm unit. Covered in full in the boss guide; the short version is that it is a positioning check, not a damage check.
Tell: a health bar, a screen-shaking footstep, and a lot of trash arriving with it.
Threat: it walks through walls and forces you out of the kill box.
Counter: open arena, rim turrets, lateral movement, Finn's Play Dead.
Priority: the only enemy worth abandoning a base for.
Reading a wave
A wave is a composition, not a count. Before you commit to a fight, identify:
- How many Goopers? If more than two, push them first.
- Is there an armored unit? If yes, save your burst for it.
- Which lane are the swarmers using? That is where the area turret belongs.
- Is the Juggernaut on the field? If yes, stop building and start moving.
The composition tells you which turret to repair first. A wave of swarmers wants the area turret online; a wave of Goopers wants the long-range turret.
Enemy behavior and terrain
Enemies path toward objectives, and they prefer the shortest route. That is why the objective is the best bait in the game: put the kill box on the path the swarm already wants to take.
Terrain changes the path:
- Cliffs and caves funnel enemies into corridors, which is good for you.
- Open ground spreads them, which is bad for area turrets but good for line of sight.
- Pipes can be walked by enemies, so a pipe through the kill box is a shortcut for them, not just for you.
Turret answers by archetype
| Enemy | Best answer | Worst answer |
|---|---|---|
| Swarmers | Area turret, mines | Single-target precision |
| Goopers | Long-range turret, Grav Beam pull | Melee range |
| Armored | Crit burst, precision | Area turrets |
| Juggernaut | Rim turrets, mobility | Walls, corridors |
The table assumes you have the turrets. If you do not, the answer is to extract, not to improvise.
What the patch changed
The launch build changed three enemy interactions that demo guides still get wrong:
- Gooper acid no longer applies damage over time. Cleanse and resist mods are less mandatory.
- Tanky enemies are less durable. Single-target builds are faster against them.
- Rocket Turrets have a smaller blast radius and slower fire rate. Area clear is still strong, but it no longer deletes a clump instantly.
If a guide tells you to build around acid resistance, it is describing the demo.
In almost every wave, the correct target order is Goopers, then armored, then swarmers. The swarmers are already coming to you; the Goopers are not.
Learning enemy audio
GRAVHOUNDS gives each archetype a distinct audio cue. Turn the music down and the effects up for a few runs. You will start hearing the Gooper rear back before you see it, which is the difference between a generator that survives and one that does not.
FAQ
How many enemy types are in GRAVHOUNDS? The launch build uses a small set of archetypes across 25 planets: swarmers, Goopers, armored units and the Juggernaut, with planet-specific variation.
Do enemies attack the base or the player? Both, and they prefer objectives. That is why the objective is the best place to build a kill box.
Can enemies use pipes? Yes. Do not route pipes through your defensive line.
What kills Goopers fastest? A long-range turret on high ground, or a Grav Beam pull into the kill box.
Is the Juggernaut a normal enemy? No. It is a boss-level swarm unit with its own fight.
Further reading
Summary
Swarmers want area damage, Goopers want range, armored units want burst, and the Juggernaut wants space. Identify the composition before the wave arrives. The boss guide covers the big one; the turret guide covers the answers.
More GRAVHOUNDS Guides
Build a GRAVHOUNDS base that survives escalating swarms: site selection, four defensive layers, power placement and layouts for solo to four players.
A first-shift walkthrough for GRAVHOUNDS: what to mine, where to build, how pipes pay for themselves, and when to call the ship.
A complete GRAVHOUNDS build for hard planets: rapid-fire crit weapon, turret support deck, Dozer mines and the exact 10-card Mod Deck.
The best GRAVHOUNDS character for solo, duo, four-player packs and boss runs, with the reasoning and the loadout each hound enables.
A practical GRAVHOUNDS Juggernaut guide: arena preparation, phase behavior, turret placement, team roles and the mistakes that wipe the base.
How GRAVHOUNDS builds work: the 10-card Mod Deck, Showstoppers, weapon choices and the stack rules that decide whether a run snowballs.